Calibration tool

Measurements are displayed in millimetres or in pixels. When pixel-size is not specified in the DICOM header or
cannot be determined (f.e. multiple values are defined in the DICOM header), any measurement will be displayed in pixels.
Use the calibration tool to convert from pixels to millimetres. Calibration should be performed by using an object of known size in the same plane as the object of
interest. Maximize the display window and zoom in around the calibration object to get the most accurate calibration.
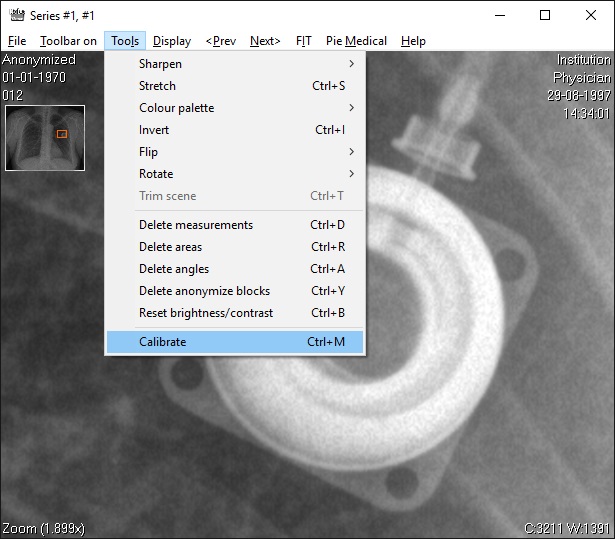
Start the calibration tool via the menu of the image window. Go to 'Tools' and select 'Calibrate'. With the left mouse
button you can now make a calibration measurement, the same way as you do with the distance measure tool.
Determine the starting point, click and hold the left mouse button, move the mouse to the end point and release.
The right mouse button enables you to zoom and use the panning window to pan the zoomed image.
The calibration mode can be cancelled by pressing the escape button any time or by taking a measurement of 0 length.
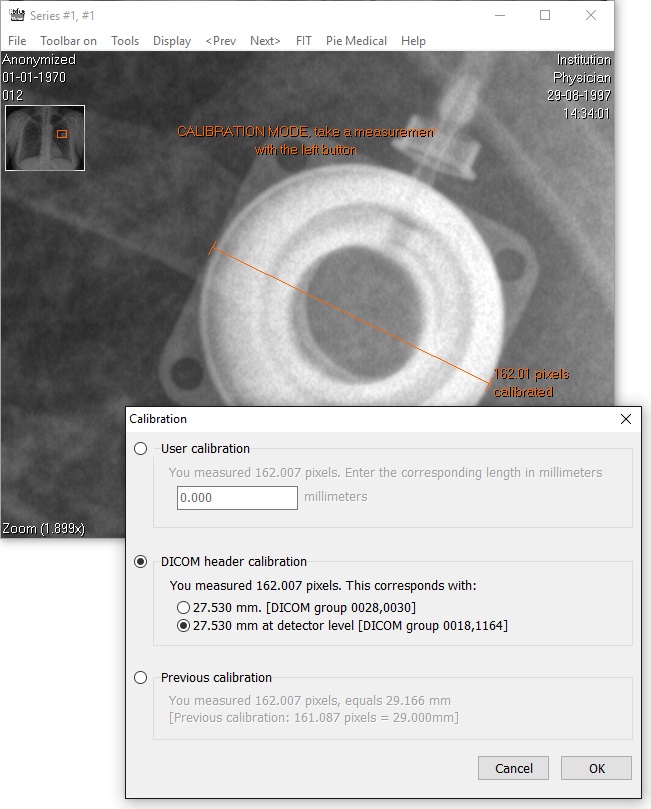
The text in the window (CALIBRATION MODE) shows you the calibration mode is active. See image below.
The calibration tool can be started automatically after completing a distance- or area measurement.
See the tools settings to select or deselect this option.

Zoomed around the object of known size, choose the Calibrate tool via the menu
After you have finished drawing the calibration line, the calibration window opens. This enables you to make 3 calibration choices:
- User calibration
Enter the precise length in millimetres of the object you just measured.
- DICOM header calibration
Use values (if available) that are stored in the DICOM header of the image.
- Previous calibration
Use the last calibration made within the last 30 minutes. This enables you to use the calibration of other images.
Press 'OK' to use the calibration of your choice or press 'Cancel' to cancel the calibration. See image below.

Enter a length in millimetres. Here, a value from the DICOM header is chosen
Further items you need to know:
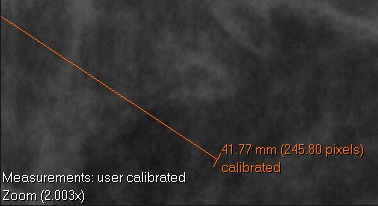
-There are 2 indications that measurements are user calibrated: 1) the orange calibration line and 2) text at the bottom left of the image window. See the image below.
-Biplane images need to be calibrated individually.
-The calibration measurement always remains visible and can only be deleted by making a new calibration of 0 length.
-In case of f.e. X-ray images, due to the diverging X-ray beam, object of the same size but placed at different
distances from the source of the beam, appear to have different sizes.
-An image pixel is assumed to be square.

Two indications that measurements are user calibrated
